


How to Take a Long Scrolling Screenshot on Mac in 2026 (Complete Guide)
How to Take a Long Scrolling Screenshot on Mac in 2026 (Complete Guide)
Let me save you the 20 minutes I wasted the first time I needed this.
I had a 4,000-pixel Slack thread to send to a developer. I pressed Cmd + Shift + 4, dragged a box, and got… one screen. The rest of the conversation was below the fold, and macOS happily ignored it. There is no native way to take a scrolling screenshot on Mac — not in Cmd + Shift + 4, not in the Screenshot app, not in Preview. If you came here hoping for a hidden Apple shortcut, I’ll tell you straight: it doesn’t exist. Windows has it in Snipping Tool. iPhone has it. Android has it. macOS, in 2026, still doesn’t ship it.
The good news: it’s completely solvable, and you have more options than most “top 8 list” blog posts admit. This guide goes past the surface. I’ll explain why Mac can’t do it natively, what actually happens when an app “scrolls and stitches,” and which tool fits which job — including the one I now use daily, ScrollShot for Mac (free, and the only option that does the whole job in one app).
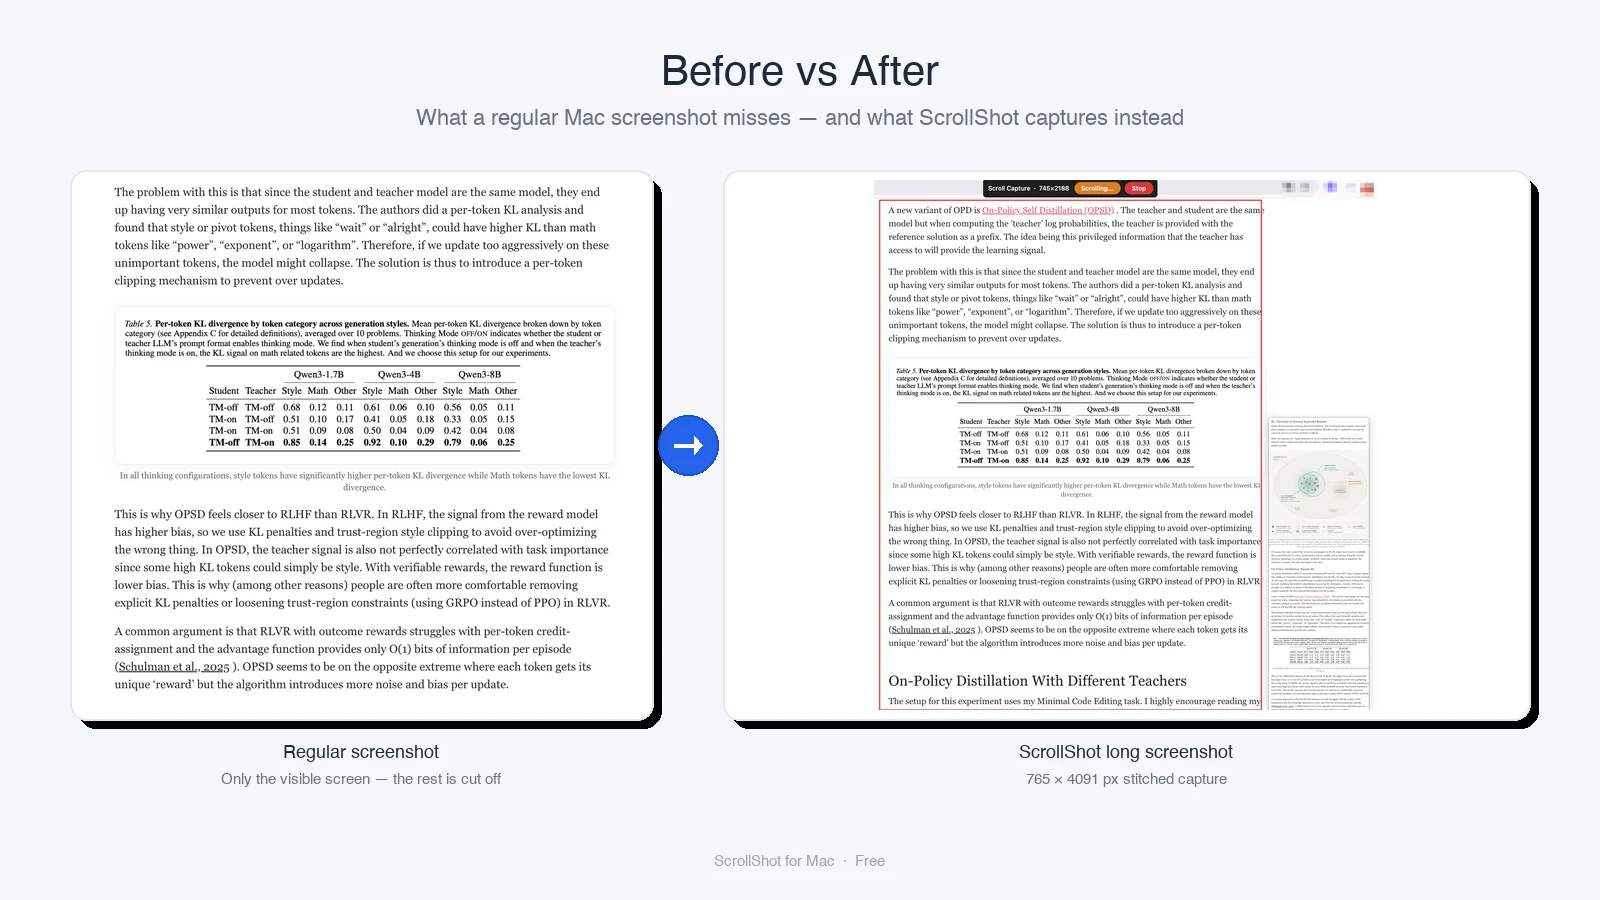
A regular screenshot captures only the visible viewport. ScrollShot captures the full 765 × 4091 px scrollable area in one image — then lets you annotate, OCR, translate, and redact it without leaving the app.
Why macOS can’t take a scrolling screenshot natively
This isn’t laziness on Apple’s part — it’s how the screen works.
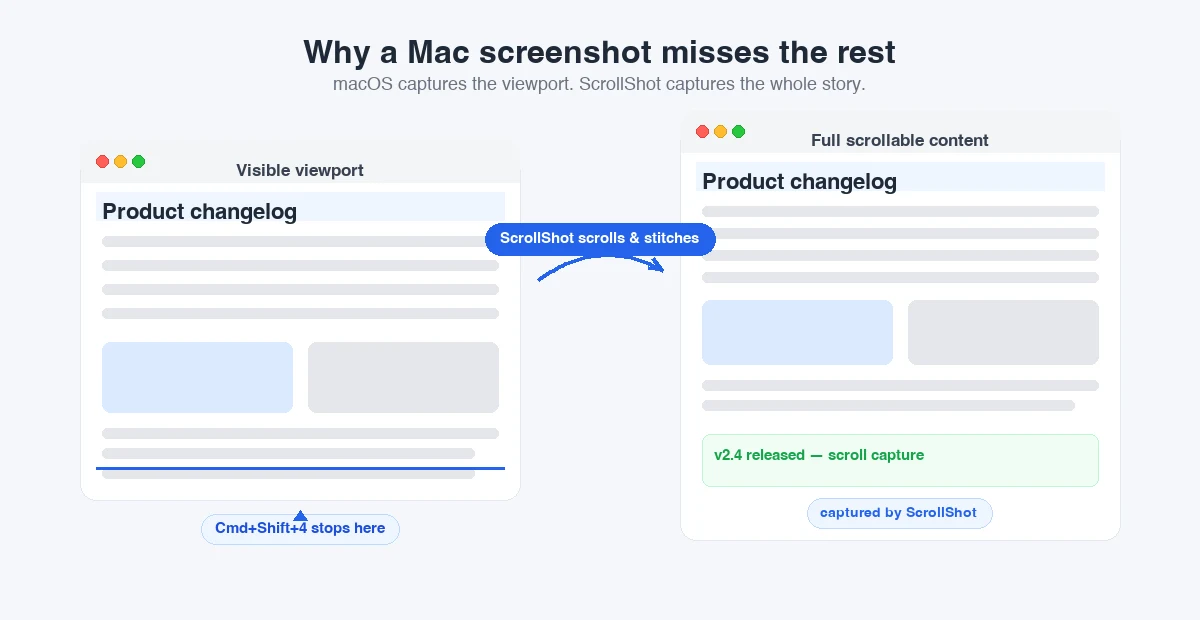
When you press Cmd + Shift + 4, macOS grabs the current framebuffer: a pixel-for-pixel snapshot of whatever is physically on screen right now. A scrolling window (Slack, a webpage, a PDF) only renders the visible portion. The off-screen content isn’t “there” to capture — it gets drawn on demand as you scroll. There’s no “scrollback buffer” like a terminal has. So a screenshot tool has two choices:
- Ask the app for its full content (only works if the app exposes it — browsers can, most apps can’t).
- Scroll a little, screenshot a little, repeat, then scroll-and-stitch the pieces into one tall image.
Every “scrolling screenshot” tool on Mac is doing #2 under the hood (or #1 for webpages only). That distinction matters, because it explains why some tools only work in Chrome and others work anywhere.
The three families of solutions
Before recommendations, know the categories. They are not interchangeable.
| Family | How it works | Best for | Can’t do |
|---|---|---|---|
| Browser-only (GoFullPage, Firefox built-in, DevTools, Safari Web Inspector) | Asks the page for full DOM/content | Web pages open in that browser | Slack, PDFs in Preview, app windows, Figma boards |
| Native scroll-capture apps (Shottr, CleanShot X, Xnapper, ScrollShot, screensnap*) | Scrolls + stitches the real screen | Any scrollable area, including non-browser apps | — (limited only by app quality) |
PDF export (Cmd + P → Save as PDF) | Renders layout to a document | Searchable archives, print | Not an image; can’t paste inline |
* screensnap (ScreenSnap Pro) is a notable exception — see the note below. It’s an annotation tool, not a scroll-capture tool.
Quick recommendation (read this if you’re in a hurry)
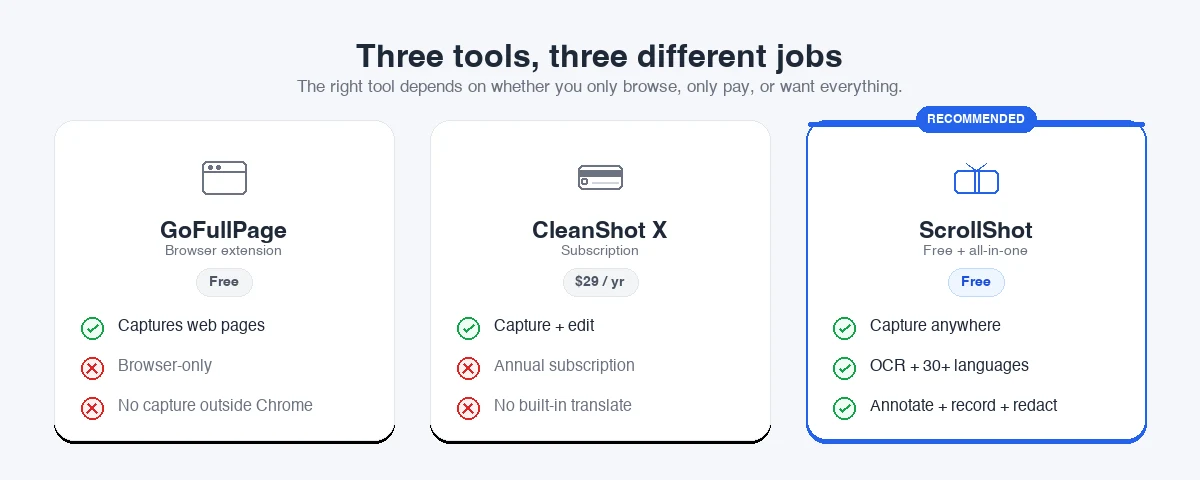
- You only ever screenshot web pages → a browser extension like GoFullPage is fine and free.
- You need to capture Slack, PDFs, app windows, or documents → you need a native app.
- You want one free tool that captures and lets you OCR, translate, annotate, blur sensitive info, and even record video — without paying or subscribing → ScrollShot for Mac. It’s the only option in this guide that does the entire pipeline natively and for free.
The full comparison (Shottr, CleanShot X, Xnapper, screensnap, ScrollShot)
I tested the common contenders on macOS 15/26. Here’s how they actually behave, not how their marketing reads. To keep this readable, I’ve split it into two focused tables — what each tool can capture, and what it can do with the result.
Capture & scope
| Tool | Price | Scrolling capture | Beyond browsers? |
|---|---|---|---|
| ScrollShot for Mac | Free | ✅ Auto-stitch via Apple Vision | ✅ Any scrollable area |
| Shottr | Free ($12 one-time to remove prompts) | ✅ Manual scroll + stitch | ✅ |
| CleanShot X | 59 one-time) | ✅ Auto or manual | ✅ |
| Xnapper | $24 one-time | ✅ | ✅ |
| screensnap (ScreenSnap Pro) | $39 one-time | ❌ No scrolling capture | ❌ |
| GoFullPage | Free (paid tier) | ✅ (browser only) | ❌ Web only |
Post-capture editing
| Tool | Annotation | OCR + Translate | Video record/edit | Auto-redact PII |
|---|---|---|---|---|
| ScrollShot for Mac | ✅ 19+ tools | ✅ 30+ languages | ✅ MP4/GIF + trim | ✅ Emails, phones, API keys, faces |
| Shottr | ✅ Basic | ⚠️ OCR only, no translate | ❌ | ❌ |
| CleanShot X | ✅ Strong | ❌ | ✅ (separate) | ⚠️ Manual blur only |
| Xnapper | ✅ + beautify | ❌ | ❌ | ⚠️ Auto privacy blur |
| screensnap (ScreenSnap Pro) | ✅ 15 tools + backgrounds | ❌ | ✅ GIF | ⚠️ Manual blur |
| GoFullPage | ⚠️ Basic crop | ❌ | ❌ | ❌ |
The screensnap reality check. screensnap’s own blog (“8 Methods Ranked by Speed”) is a genuinely useful ranked list — but notice what it recommends for the actual capture: GoFullPage and Shottr. ScreenSnap Pro itself cannot take a scrolling screenshot. It’s built for the next step (beautify + annotate + share a capture you already made elsewhere). So if your problem is “I need the long screenshot in the first place,” screensnap is not a capture solution; it’s a post-capture one. ScrollShot, by contrast, does both the capture and the annotate/blur/share step in the same free app.
How “scroll and stitch” actually works (and why it breaks)
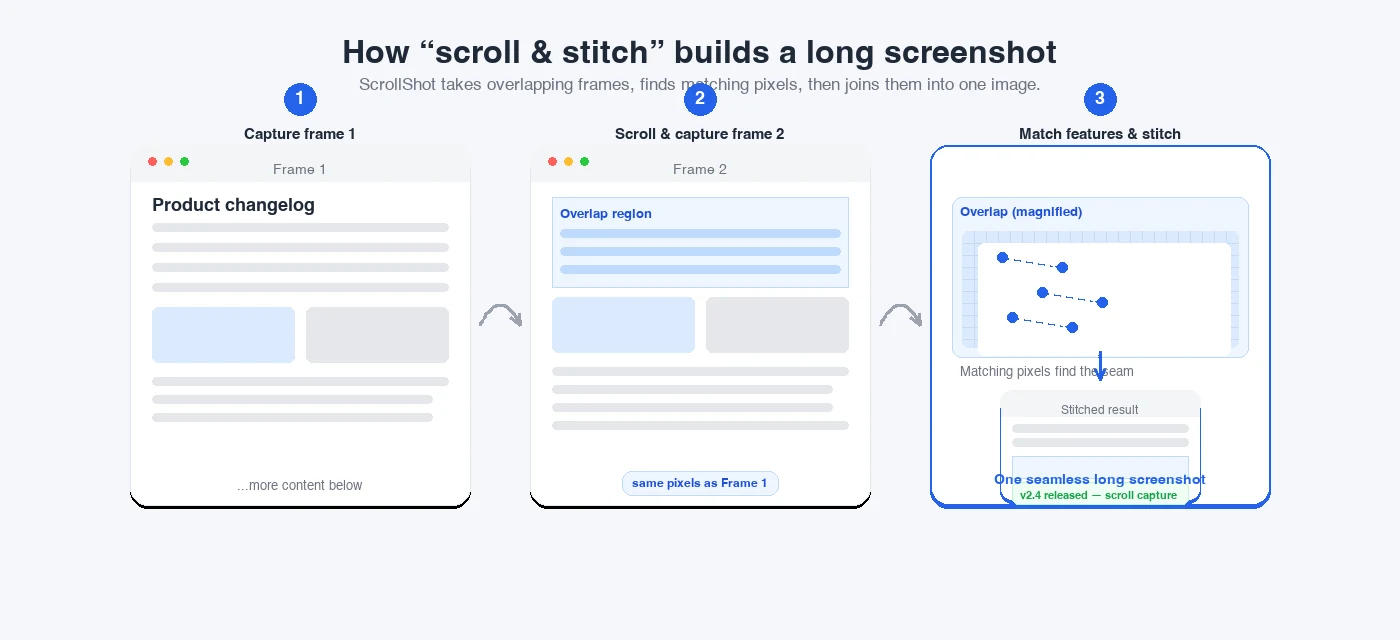
When ScrollShot (or Shottr, or CleanShot) takes a long screenshot, the scroll-and-stitch process is:
- Captures the visible region.
- Simulates a scroll (or waits for you to scroll).
- Captures the next region.
- Matches overlapping pixels between the two frames to find the seam.
- Stitches them, then repeats until you stop.
The matching step is where tools live or die in any scroll-and-stitch workflow. ScrollShot’s stitching engine uses Apple’s Vision framework for frame matching, which is why it handles variable scroll speeds and minor layout shifts better than naive pixel-diff approaches. Three things still break any stitcher:
- Sticky headers/footers that don’t move while content does → duplicate bars. (Close chat widgets and cookie banners first.)
- Lazy-loaded content that only appears after you scroll → blank gaps. (Scroll through once, then capture.)
- Fixed-width assumption → if you resize the window, the output width changes. Decide your width before capturing.
Step-by-step: take a long screenshot with ScrollShot for Mac
This is the workflow I now use for everything.
1. Install (30 seconds).
Download from mac.scrollshot.work/ScrollShot.dmg, open the DMG, drag to Applications. No account, no license key.
2. Trigger scroll capture.
Press the scroll-capture hotkey (or pick it from the menu bar). Drag a box around the scrollable area — a webpage, a Slack pane, a PDF column, whatever.
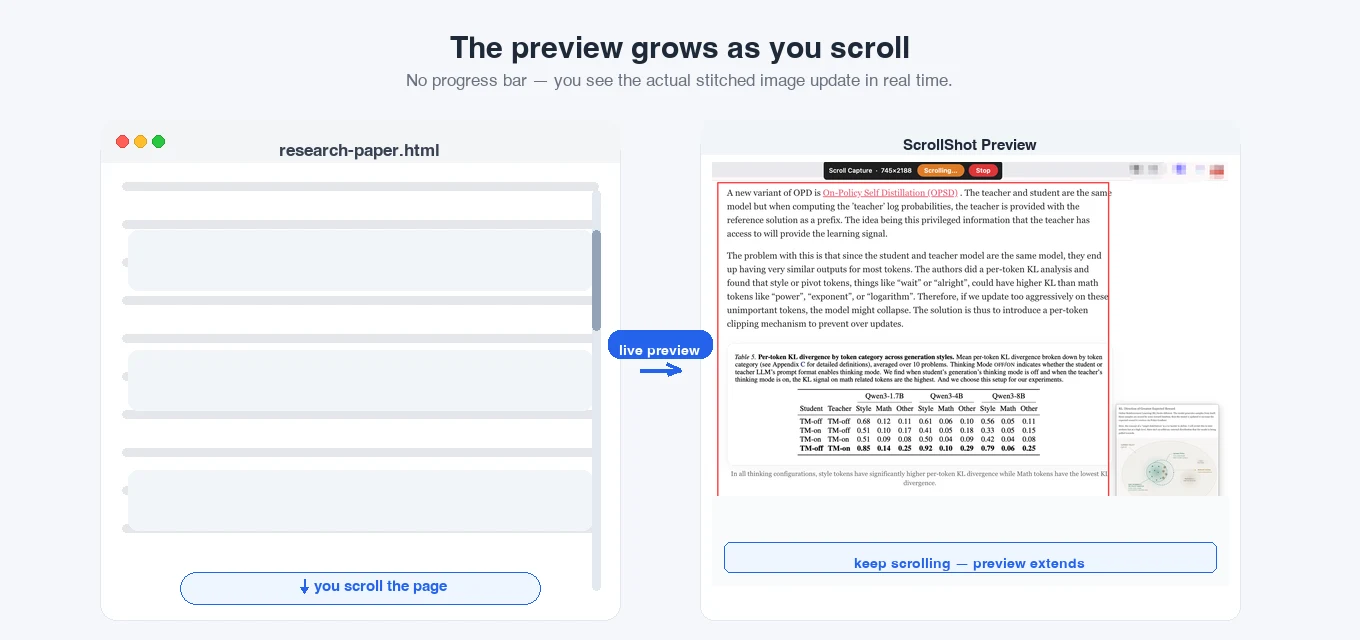
3. Scroll.
Scroll with your trackpad or mouse wheel. ScrollShot auto-stitches live; you watch the tall image grow in the preview. Stop when you’ve captured everything.
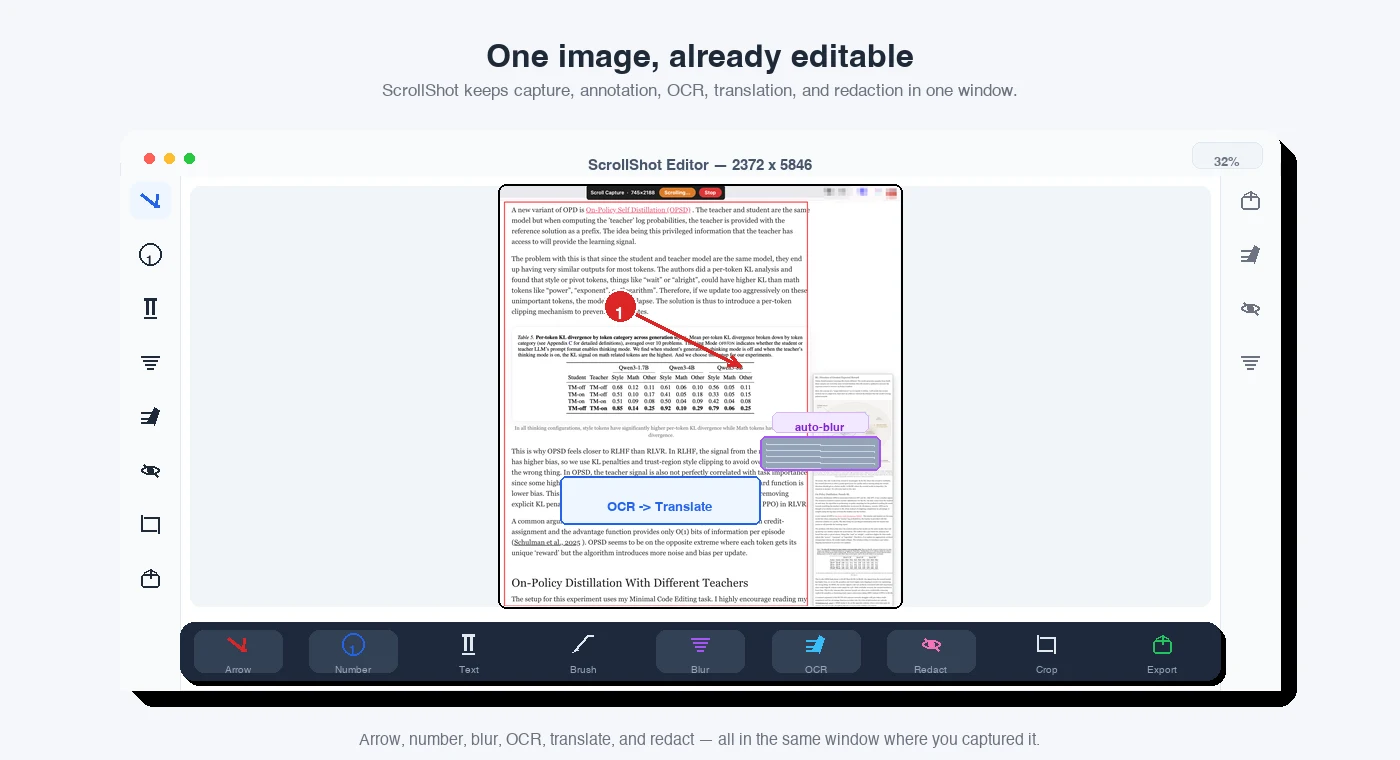
4. One image, already editable.
When you finish, you’re not dumped into a separate editor. The same window lets you: add arrows/numbers, OCR the text and translate it to 30+ languages inline, blur or auto-redact emails/phones/API keys/faces, then export as PNG or save to a beautified gradient background.
5. Share.
Copy to clipboard, upload to your S3/Cloud, or export. Done — without leaving the app.
That last point is the actual reason I switched. With Shottr I’d capture, then open another app to annotate. With CleanShot X I’d pay $29/yr for the privilege. After the scroll-and-stitch capture, ScrollShot does capture → edit → translate → redact → export in one pass, free.
When you should not use a scroll-capture app
Be honest about the job:
- You need searchable, copyable text (legal archive, research PDF) →
Cmd + P→ Save as PDF. A 12,000-pixel PNG is not searchable. - You only screenshot one browser and never leave it → GoFullPage or Firefox’s built-in “Take Screenshot → Save full page” is lighter weight.
- You need pixel-perfect print layout → PDF again.
For everything else — chat threads, docs, settings panes, long webpages you’ll annotate — a native scroll app wins.
Common gotchas (and the fix)
- Duplicate header in output → sticky element. Dismiss it or use a tool with good sticky handling before capturing.
- Missing middle section → infinite scroll / lazy load. Scroll to the bottom once, then capture from the top.
- Blurry text → captured at low DPI. Make the window larger (or zoom in) before capturing.
- Huge file size → a 10,000px-tall PNG can be several MB. Compress before sharing, or split into sections for readability.
FAQ
Can I take a scrolling screenshot with the built-in Mac Screenshot app?
No. Cmd + Shift + 4 and the Screenshot app only capture the visible screen. You need a browser feature, a PDF export, or a third-party app like ScrollShot, Shottr, or CleanShot X.
What’s the fastest free way to take a scrolling screenshot on Mac?
For web pages only: GoFullPage (under 30 seconds). For anything outside a browser (Slack, PDFs, apps): ScrollShot for Mac or Shottr — both free, both work on any scrollable area.
Is there a free scrolling screenshot tool that also translates and redacts?
Yes — ScrollShot for Mac. It’s free, and uniquely combines scroll capture with OCR, 30+ language translation, 19+ annotation tools, and automatic PII/face redaction in one app.
Do scrolling screenshots work for PDFs and documents?
Yes, if you use a native scroll-capture app (ScrollShot, Shottr, CleanShot X) on the PDF open in Preview or a reader. The built-in “Save as PDF” gives you a document, not an image.
Why does my scrolling screenshot have duplicate headers?
The page has a sticky element (chat bubble, nav bar, cookie banner) that stays fixed while content scrolls. Close or hide it before capturing.
What format should I save scrolling screenshots in?
PNG for quality and transparency; JPG if file size matters and you don’t need transparency; PDF only if you need searchable text.